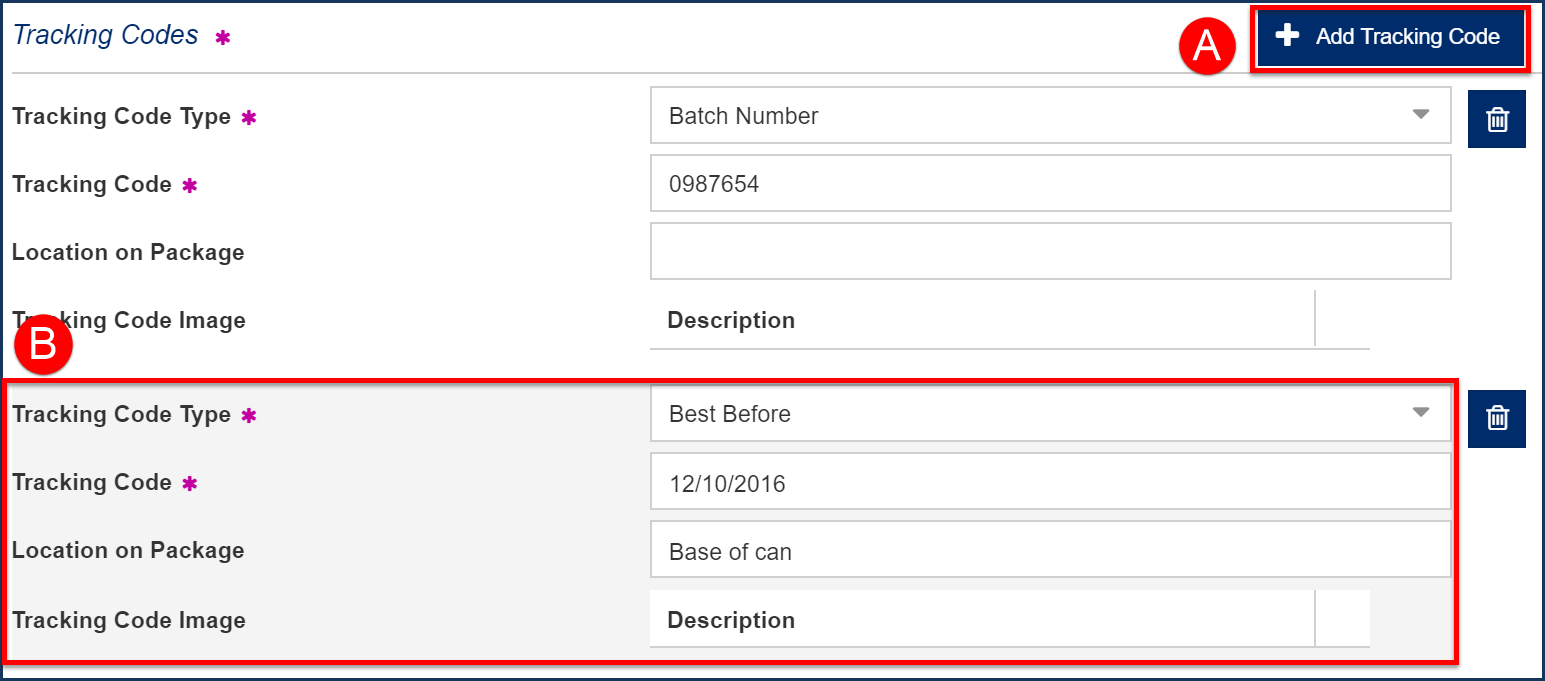
Various reasons can lead to a notification being updated (additional batches affected, changes to geographical area affected and so on).
Please note that in the new ProductRecallNZ system, update functionality has been significantly improved. Key improvements include:
- Ability to send out an update in order to add a recipient, where only the recipient who has been added will be notified.
- Ability to send out an update of a distributed notification where only a new recipient has been added - Only this new recipient will be notified.
- Improved view of Update Information for receivers in the Notification Summary, Notification Detail and PDF documents.
You will follow the same process for updating a Mock and Live notification, the only difference is the mode you are logged into (Live Mode or Mock Mode).
Section 1: Updating your Notification
Section 2: Updating a Distributed Notification
Section 3: Viewing an Updated Notification
Please follow these steps to update a notification:
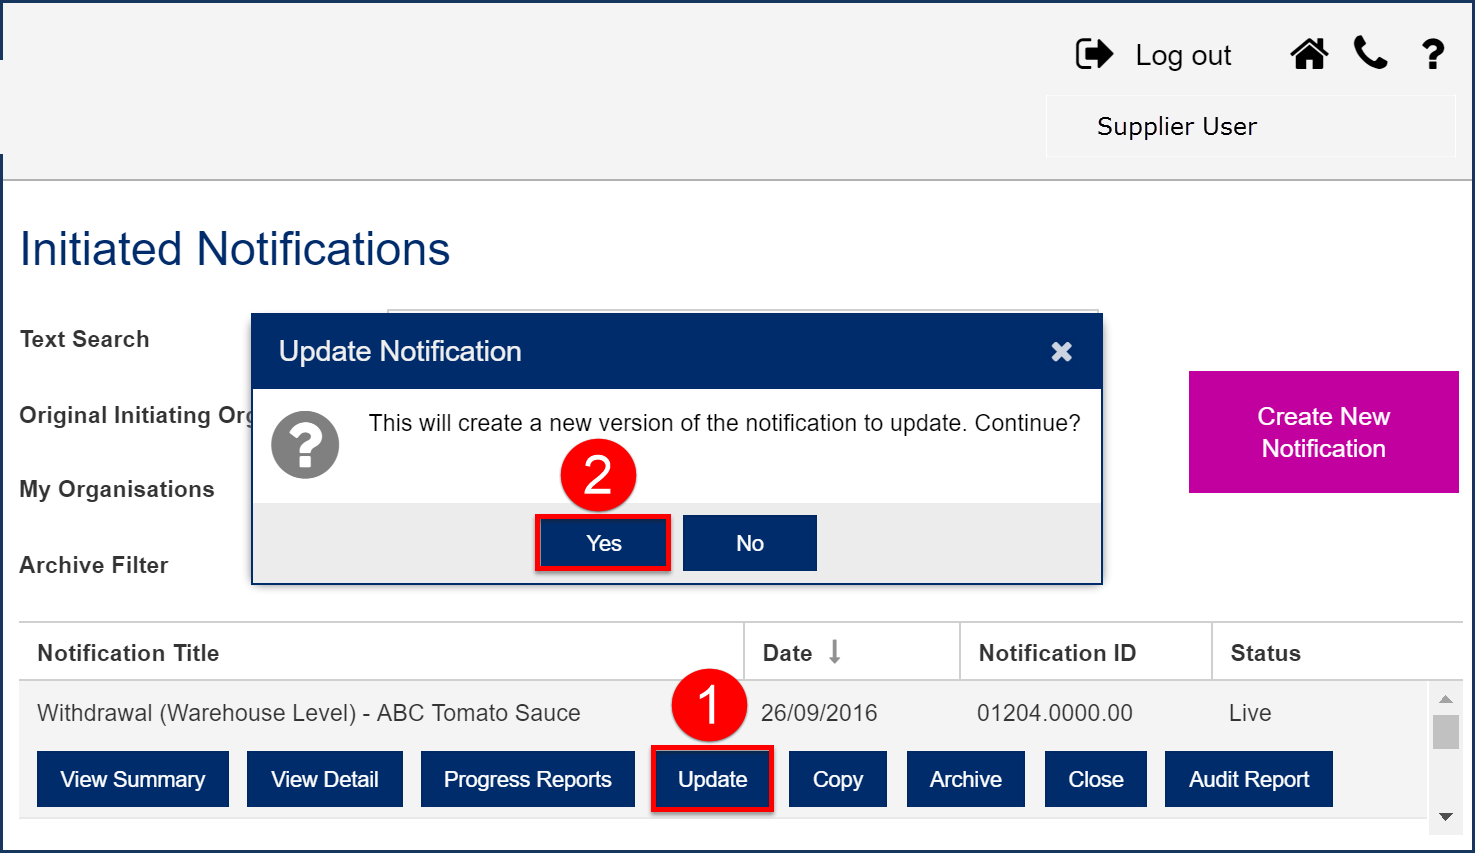
Step 1 -The organisation's Initiator User, logs in and selects 'Update' on the live Notification. Notifications will be sitting on the 'Initiated Notifications' page, which is the home page for Initiator Organisations.
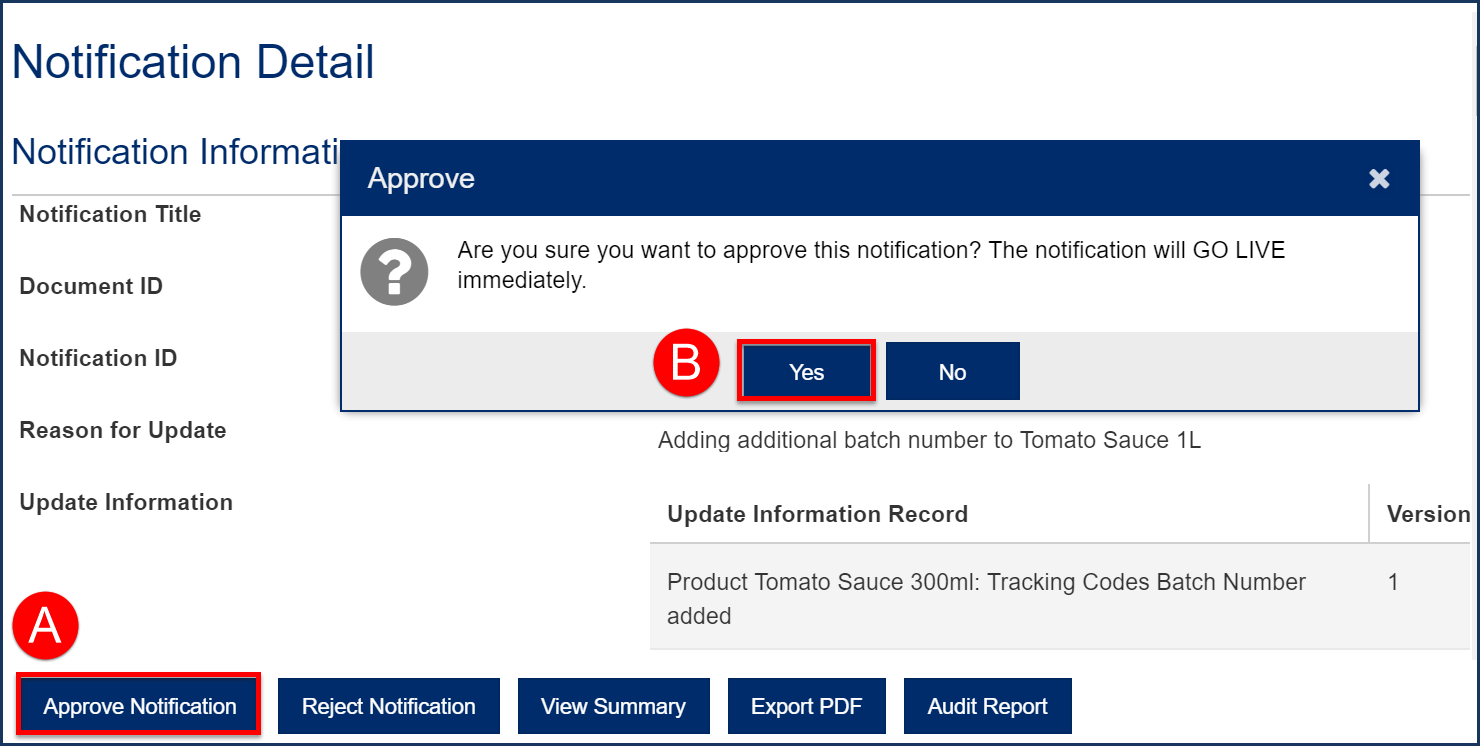
Step 2 - User selects 'Yes' on 'Update Notification' dialogue box.
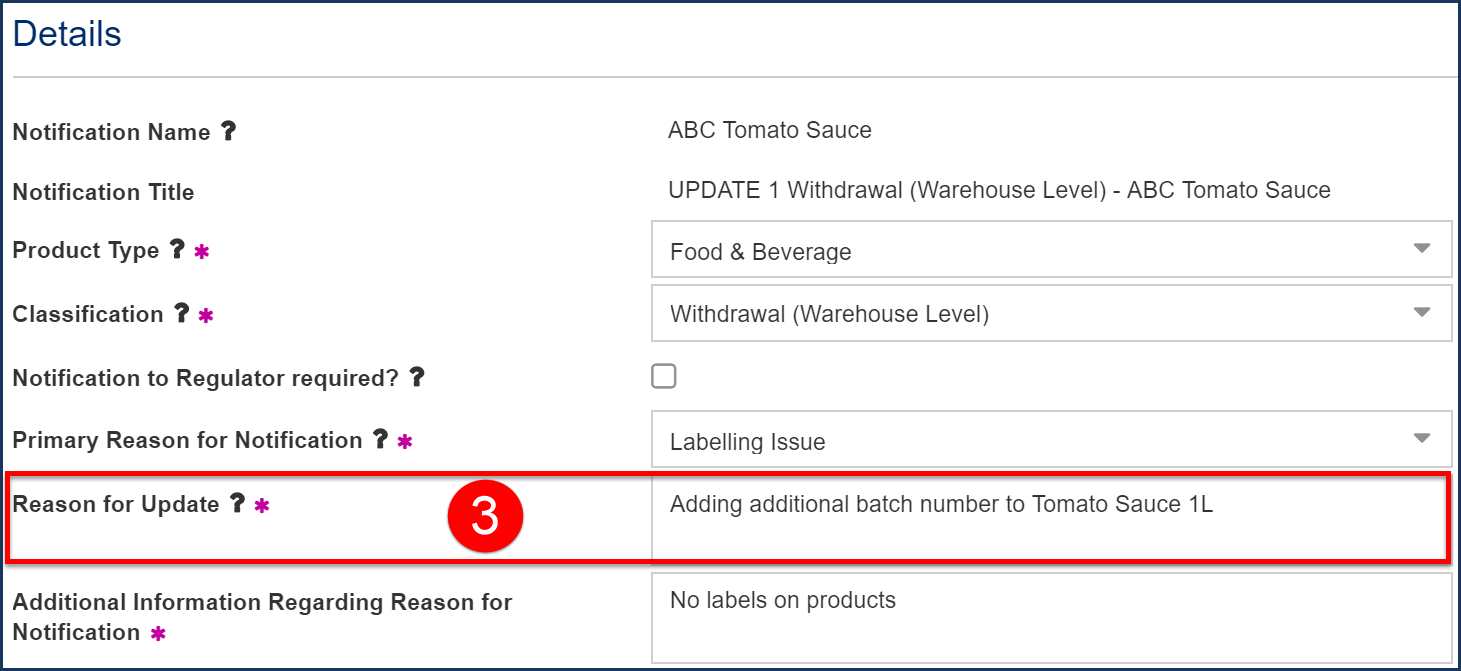
Step 3 - User must complete the 'Reason for Update' field on the 'Notification Details' page
Step 4 - The user then moves to whichever template needs to be changed and make changes (e.g. If additional batches have been affected, this would require changes on the Item Details template).
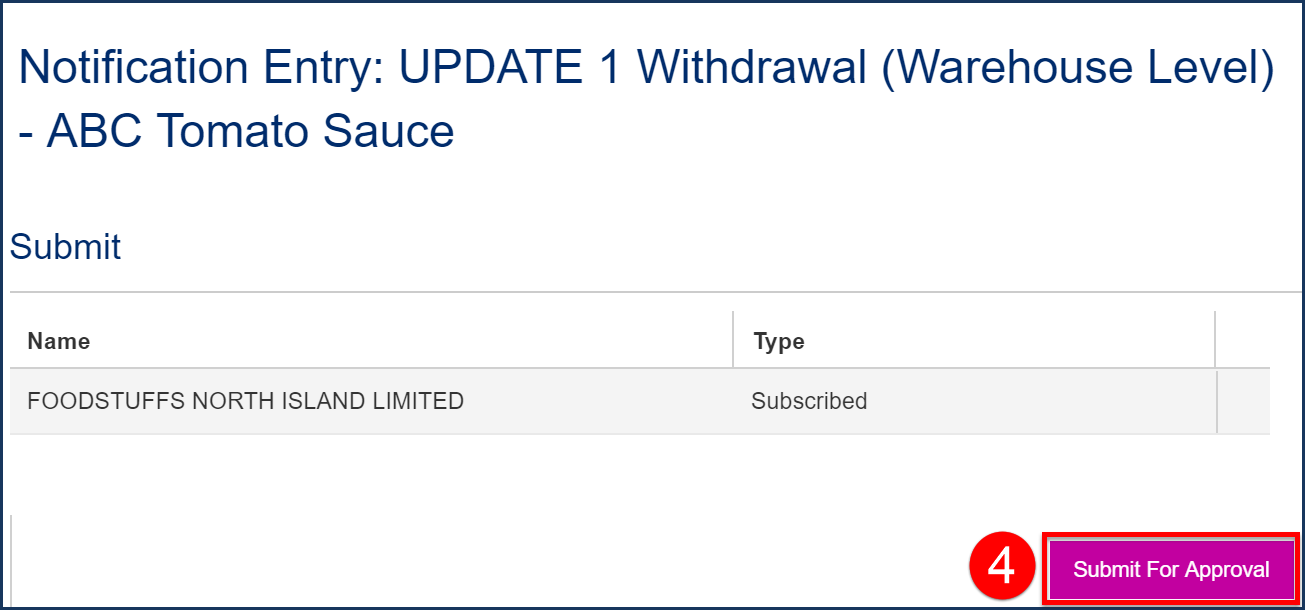
Step 5 - When all changes have been made, move to the 'Submit' screen on the left hand menu. On the bottom right of the screen, select 'Submit for Approval'. Now the 'Approver' user must login and 'Approve' and 'Issue' the notification ('Go Live') to send out the update.
Note - You will notice that a number of fields are not editable in Update Mode including the ability to delete recipients and products. If these attributes need to be changed, you will need to generate a new notification to communicate the changes to Recipients. This can be done by pressing the 'Copy' button to create a draft replica of the live notification.
Section 2: Updating a Distributed Notification
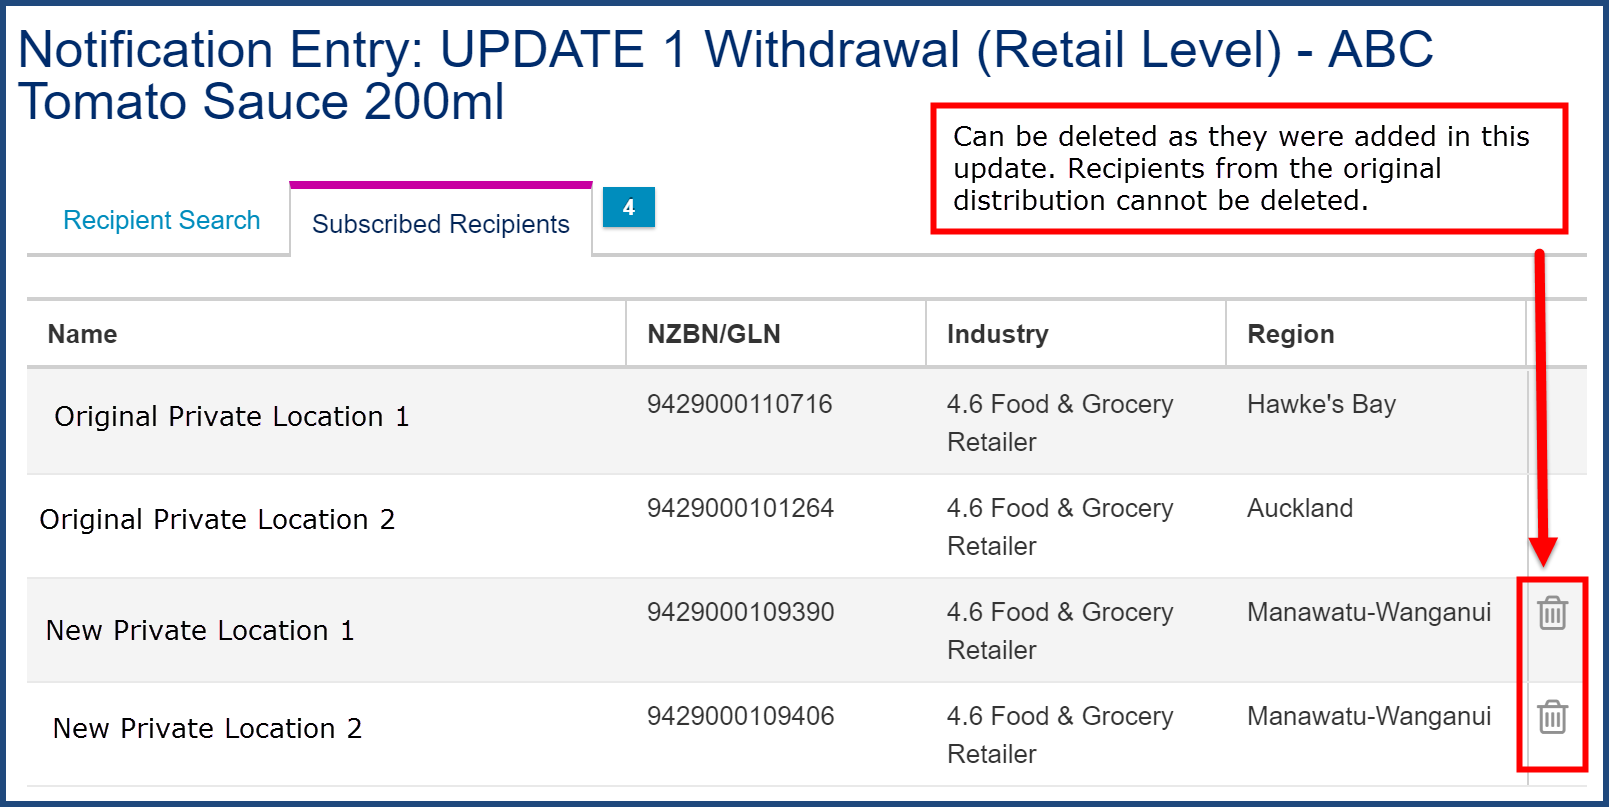
It is possible to update a distributed notification in order to add additional recipients.
Step 1: Select 'update' on the distributed notification

Step 2: You will see that very few fields are editable when updating a distribution. First, you will need to enter an update reason. This will likely be a result of needing to add another file to a file upload field, or adding additional recipients.

Step 3: Add recipients to the notification as usual. You will see that the recipients from the original distribution cannot be removed from the notification, but new recipients can be added and deleted.
Step 4: Once you have made all required changes and all mandatory fields are completed on the updated distribution, please Submit for Approval and Approve/Go Live as you did when you first distributed the notification. If you added recipients and nothing else, notification of this update will only go to the new recipients.
Section 3: Viewing an Updated Notification
As an Initiator of a notification or Supplier
You will see all the updates you have made. However, the notification recipients will only be able to see the updates that are relevant to them. If you entered specific information for a certain recipient, this information will only be sent to them. If you added an additional recipient when updating the notification, only that newly added recipient is able to see this update information.
View of Update Information when looking at the Summary, Detail or PDF Report

Version 1.2: Last Updated May 2017