This article covers the basics in 'How to Submit' a notification for approval and then how to approve it.
1. 'Submit' Template
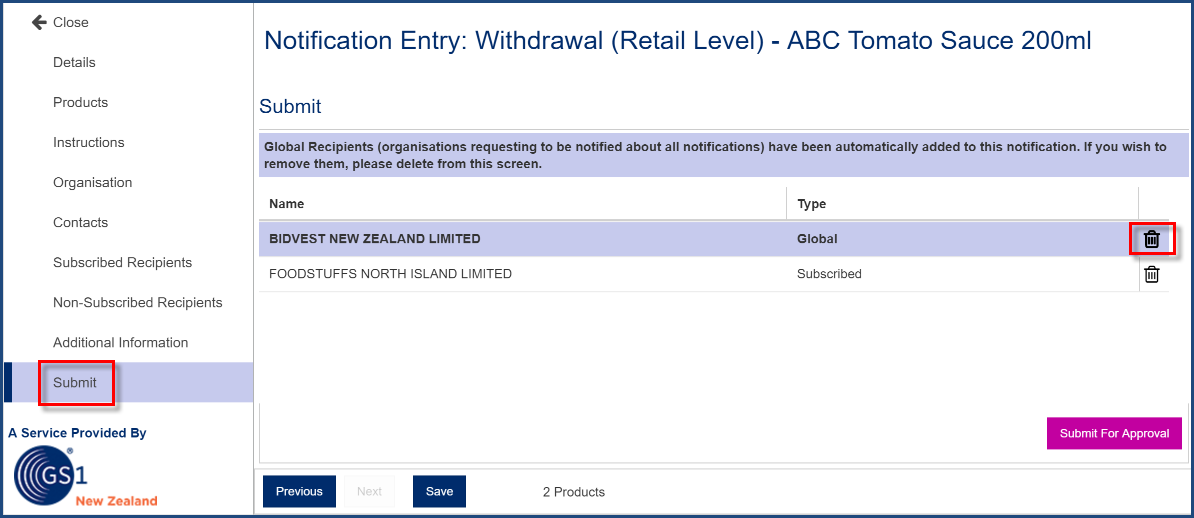
This is the last screen that the Initiator will see before they submit their notification for approval. When all mandatory fields are filled in, you will be able to review the recipients then submit the notification for approval.
You will see a list of all contacts who are recipients for this notification.To delete a recipient (apart from a regulator such as Ministry for Primary Industries or Ministry of Business, Innovation and Employment), select the rubbish bin icon to the right of the recipient name.
To add additional recipients, please return to either the "Subscribed Recipients" or "Non-subscribed recipients" article.
To delete a regulator such as MPI or MBIE from the notification, you must return to the product details screen and select 'No' for 'Notification to Regulator Required?'
Please note that Bidfood is a 'global recipient' on our system - it is optional if you want to include them in the notification - if you want to delete them please see the image below.
2. Submitting a Notification for Approval
If you are both an Initiator (user who can create notifications) and an Approver (user who can approve notifications and make them 'live'), then you will be able to submit the notification for approval and also appove and issue it. Please see this article for more about user roles in ProductRecallNZ.
When you "Submit for Approval", you will be returned to the "Initiated Notifications" screen and the notification will have the status of "Submitted for Approval". If you wish to cancel the submission in order to edit details, please press the "Cancel Submission" button or the approve/reject button, then reject the notification (Please note: you will be required to enter a reason for rejection)

3. Approving and Going Live with a Notification
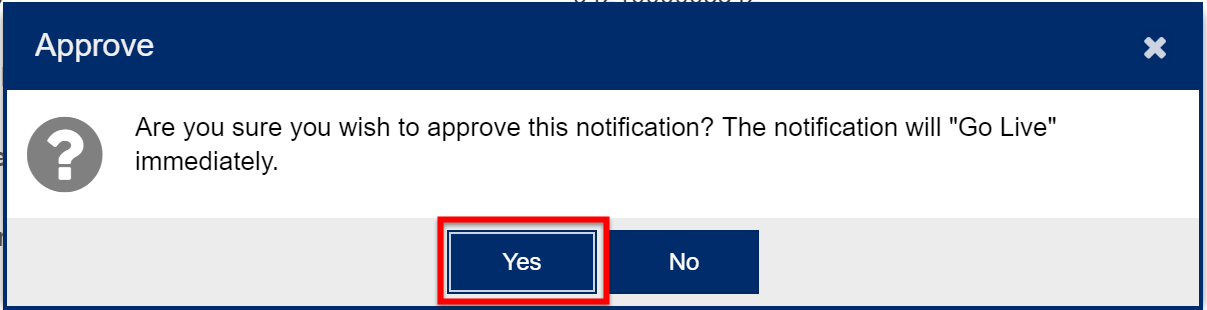
The Approver user must login and find the notification on their 'Initiated Notifications' page. They will be able to approve the notification by clicking the Approve/Reject button underneath the relevant notification then selecting "Approve Notification" on the bottom of the detailed view of the notification.

If you select "Approve" and your organisation is set up with 'One Step Approval' (the default option in our systems), a dialog box will pop up warning you that approving a notification means it will go live immediately.
Once you have 'Gone Live' you will be returned to the 'Initiated Notification' Page and will see a 'Live' status next to your notification. Your notification is instantly sent out to all the recipients that you specified and they are notified via email and/or SMS to login and check it (Live Mode) and for a Mock Notification, no alerts are sent to the chosen recipients/regulators, but GS1 NZ is notified and will provide a feedback report on your Mock Notification.

Version 1.2: Last Updated 13 December 2018